


This article written by Dr. Chema Molina, Frenetic is continuation of his series of articles about Magnetics Design started by the article How to design an inductor.
In the first article, I designed a DC inductor with Ferrite material.
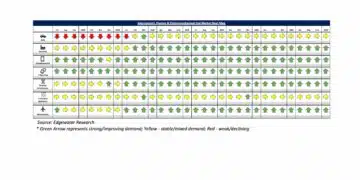
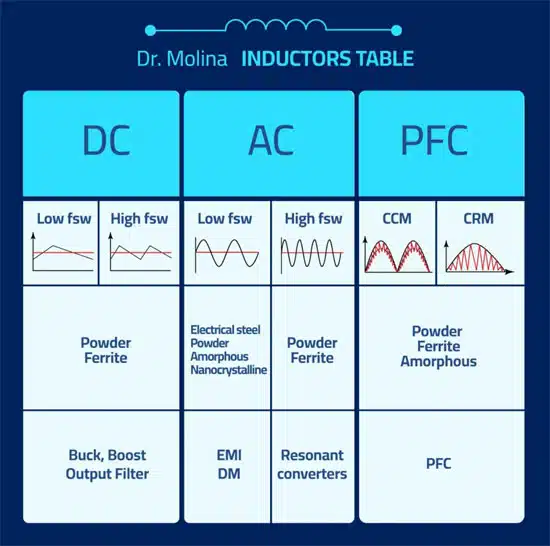
As you can see in My table of Inductors in Figure 1., the most common materials for DC inductors are ferrite and powder. In this article, I will focus on a higher energy inductor using Powder material.
The powder manufacturer I use to work with is Magnetics. They also recommend Frenetic as an external tool, however, they provide enough information to help you in the design process at this link (https://www.mag-inc.com/Design/Technical-Documents/Powder-Core-Documents).
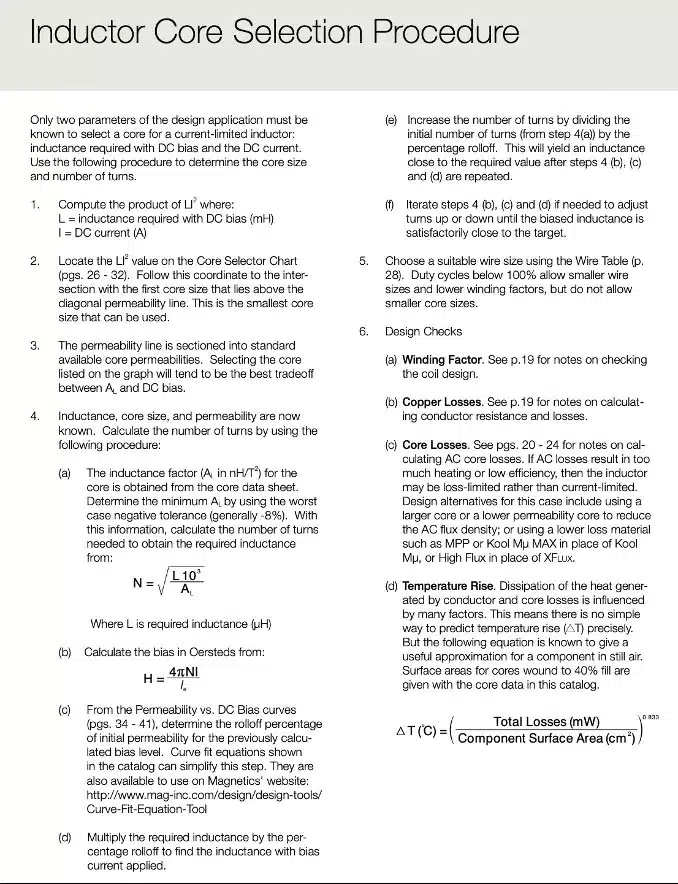
Magnetics provides you with an algorithm to design an inductor with their catalog.
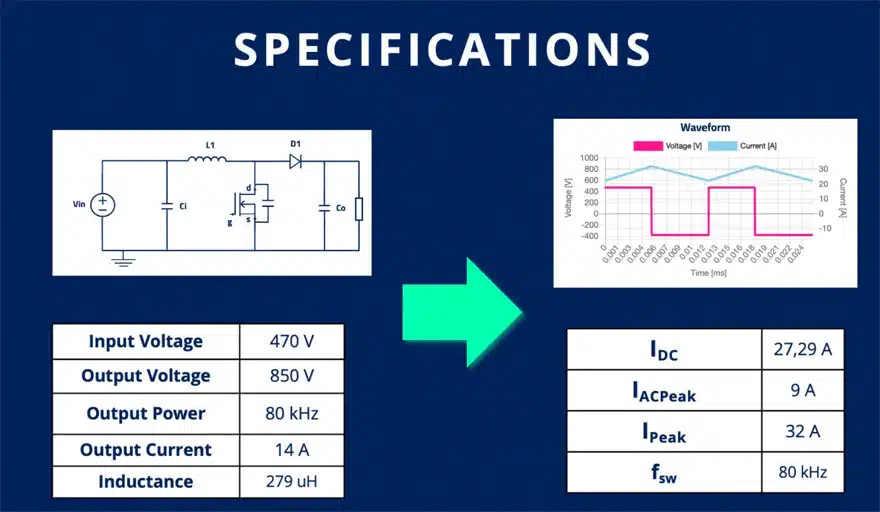
Case Study How to Design High Energy Power Inductor – 12,5 kW Boost Converter
The specs of the inductor we will use as a case study are based on the WOLFSPEED application note of a 4 phases boost converter of 60 kW, 12,5 kW for each phase.
Following the Magnetics algorithm
The first step is to calculate the total energy:

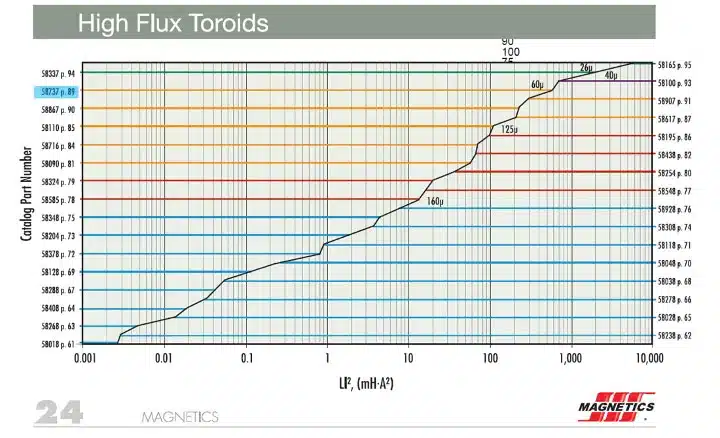
With this value, we will choose a magnetic core and material. Each material will offer you a different balance between energy stored and inductance stability. I choose High Flux.
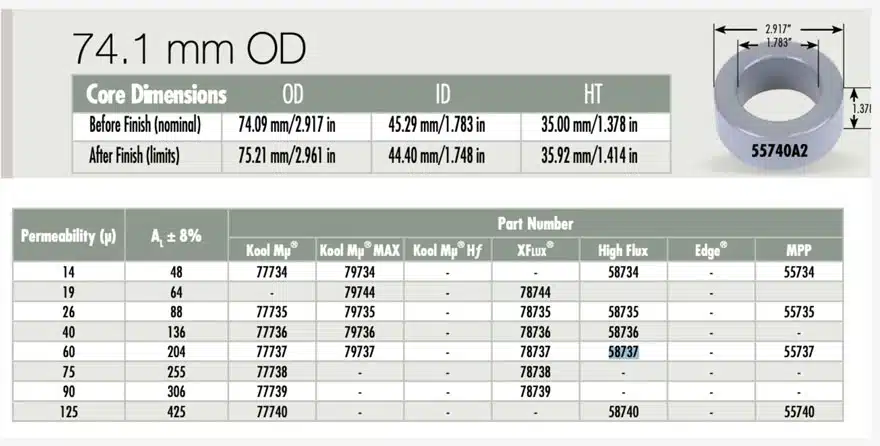
In the material graph, you have to choose the part which has a higher value than the energy calculated before. As you can see in the picture below, for this case, we are choosing part 58737.
In the same catalog, we can go to check the parameters of this core. On this page, you can find the physical description of the component and the permeability values as well as some support for the winding process regarding the window area.
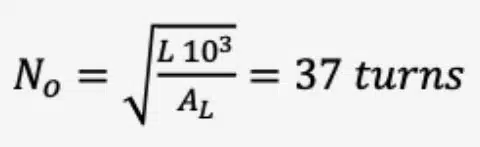
With the material selected, we have to calculate the number of turns for the selected core:
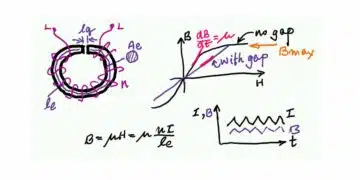
This is the first approximation, now, we have to ensure the inductance required at the DC current, because with this material the inductance decrease with the DC current. For this purpose, we will calculate the H:
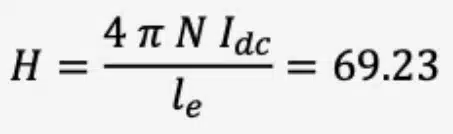
Then, we go to the permeability versus DC bias (H) curves for this material and we can find the percent to correct the number of turns – see Figure 5. In this particular case for H= 68.6, the % of permeability is 93%.

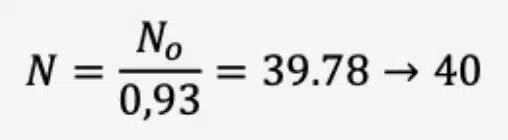
With 93% we can recalculate the number of turns:
If you want to know the value of the inductance for each DC current, you can create a function to calculate each point. For a boost converter, the most important is to be sure, the minimum inductance won´t increase the output ripple out of your limits.
Now, we have the core and the turns, the algorithm of magnetics proposes we choose the AWG wire to meet a maximum of 5A/mm2 . This is quite simple, with the 27,4 A of DC current, the minimal area of the wire should be:

Following this rule, we will choose between AWG 9 or 10. However, these wires could be very wide and difficult to manage. I would recommend choosing a thinner one and putting some wires in parallel. In my case, I have chosen AWG 12 and 2 parallel wires.
You need to check the window area, to ensure that the number of turns with your specific diameter will fit in the area available. In this case, I’m using 21.9% of the space. The maximum space is relative to a lot of factors but as a rule of thumb, I would say 60% is the limit.
As you can see, in this process we have calculated any losses or talked about proximity due to winding configuration. In the Magnetics document, there is support to calculate the losses, however, from my point of view, it’s complex and it could produce a lot of human errors in the process.
Therefore, the design is completed. I have checked the losses using Frenetic because their proposal is very simple. The total losses are 12,5W
Design using Frenetic
When I started building this product, I reviewed my old process and asked myself, what would help me a lot in the process?
I had three requests:
1. Automatic inductance calculation
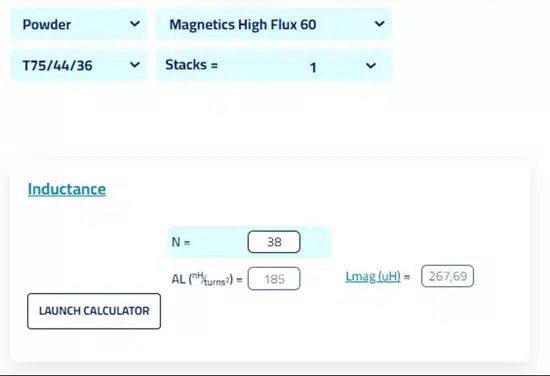
Automatic inductance calculation for each DC bias and all the materials to avoid checking one by one graph and calculating the number of turns in an iterative mode. Therefore, this is our inductance calculator – see Figure 6. Where calculating the inductance for any magnetic core, for any DC inductance is just a matter of seconds. Here, I can calculate the number of turns for each core or most important. Multiple Stacks of cores.
2. Automatic Curves for each material
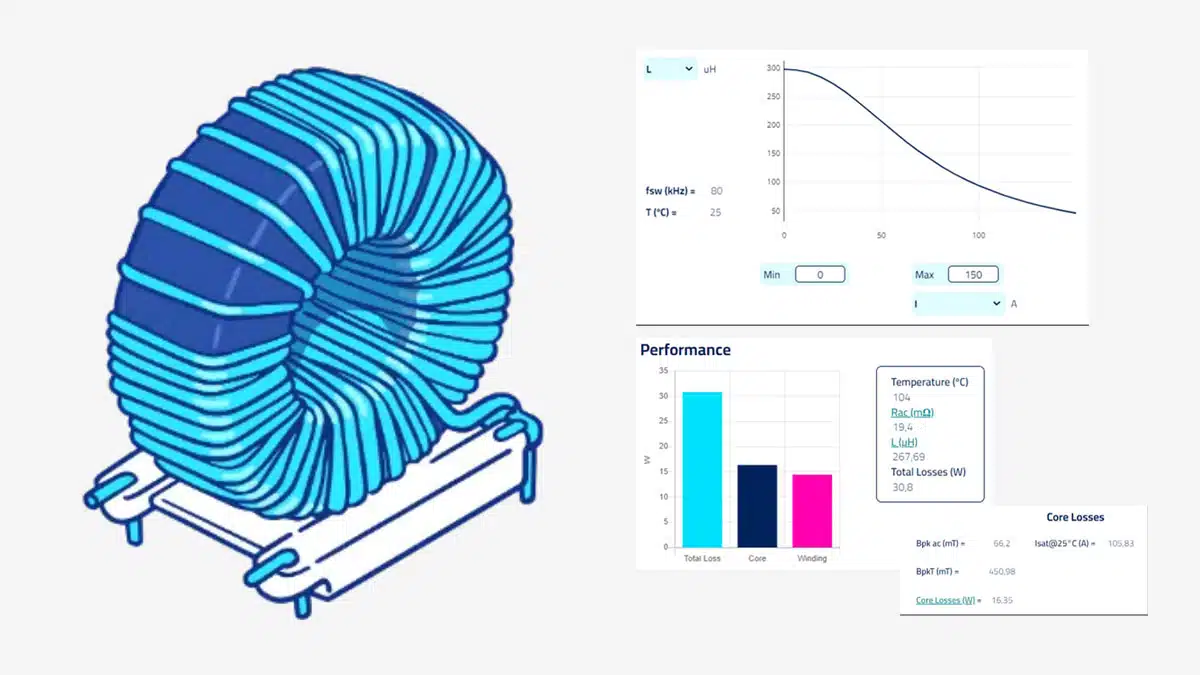
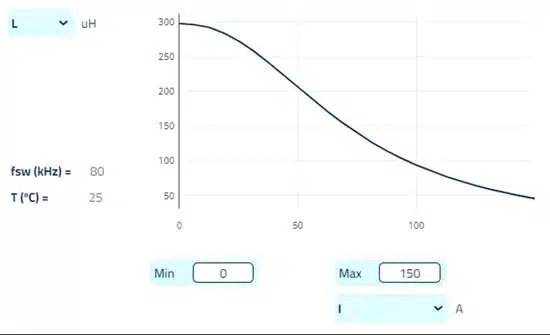
The inductance depends on the current, with this curve, I can see the whole behavior of the component – See Figure 7.
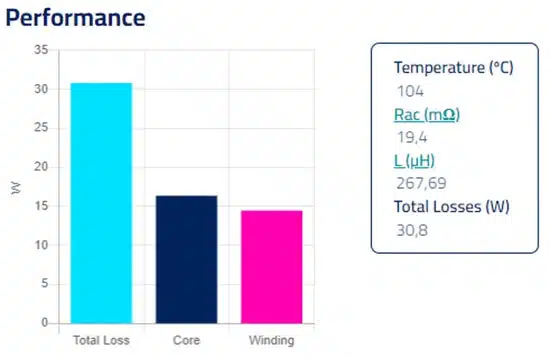
3. Losses & Saturation
With an automatic losses calculation, I can compare different designs, considering losses in the core and the winding. As well as using litz wires, and calculating proximity losses for high-frequency applications with several layers – see Figure 8.
Something to have in mind during a design is the saturation current. To avoid problems with current peaks which could saturate the system, Frenetic provides automatically the saturation current – see Figure 9.